Ashes of Creation throws a lot at you immediately when loading into the game: different systems, caravans, gathering, open-world PvP, the list goes on. But whether you’re planning to play crafter, raider, or ganker, you still need to win fights. And if you’ve rolled a mage, that means learning how to delete health bars before enemies ever touch you.
This early-game guide breaks down how to play mage from levels 1–10, focusing on solo efficiency and clean single-target burst. Group play and big AoE builds come online later; for now, you want a rotation that:
- Kills fast
- Feels smooth
- Lets you farm mobs and early elites with minimal downtime
Everything here is built from actual in-game testing during the pre-Harbinger phase and will stay relevant with minor tweaks as systems expand.
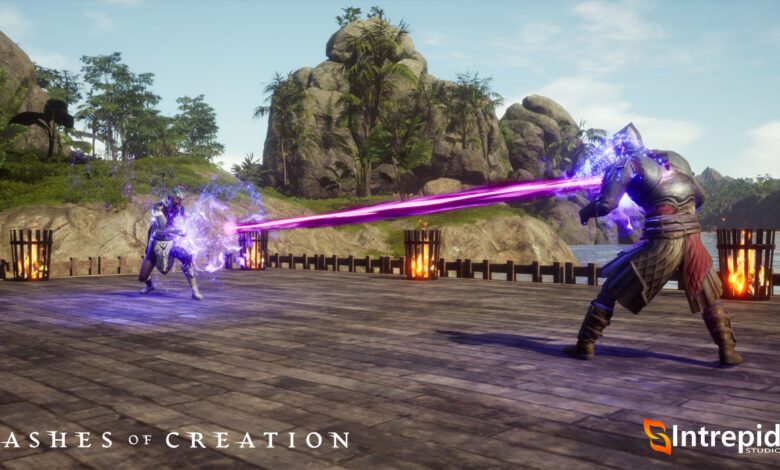
Combat Basics: How Mage Actually Feels in Ashes of Creation
If you’ve played tab-target MMOs like WoW, EverQuest, or Guild Wars, the core targeting will feel familiar: tab or click to select a target, then run your rotation. Ashes layers some “soulslike” elements on top that matter a lot for Mage.
There are three key resources:

- Health: obvious.
- Mana: fuels your big damage spells.
- Stamina: used for dodge, sprint, and block (block is mostly for tanks and melee).
- Dodge isn’t a full invulnerable i-frame, but a well-timed dodge still provides a significant evasion spike. Use it to avoid telegraphed swings and casts.
- Sprint consumes stamina. Learn to balance sprint and dodge, so you’re not out of stamina when you actually need to avoid a heavy hit.
More elements that are important for the class:

- Weapon swap matters. You can equip two weapons and swap between them:
- Spellbook/Wand: ranged autos and primary spellcasting.
- Scepter/Mace: shorter range, cleave autos, and some defensive utility.

- Stamina Tree: For solo mage play, one of your best early investments is Increased Dodge Distance (Springstep-style node). The extra distance is massive for kiting.
- Auto Attack setting under Gameplay → Combat, you can set autos to resume after casting. Many players prefer auto-attacks to auto-resume, so your basic attacks weave naturally between spells. For Mage, that setting usually feels smoother.
The mage fantasy in Ashes is very much like a “glass cannon that never gets touched.” Your toolkit supports that. As long as you use stamina, dodge, and blink intelligently.
Core Mage Mechanics
Before we talk about levels, you need the single most important mechanic burned into your brain:
Elemental Finisher Reset
Your auto-attack chain has a third hit called a finisher. That finisher carries an element and can:

- Apply effects (ignite, freeze, etc.)
- Reset the cooldown of the associated spell:
- Lightning finisher → resets Lightning Strike
- Frost finisher → resets Frostbolt
- Fire finisher → resets Firebolt
This is how you turn short cooldowns into near-spammable nukes. Most of your early-game power hinges on:

- Getting a finisher as often as possible
- Making sure the element matches the spell you want to reset
- Lining that up with your burst window
There’s also a Deadly Finisher mechanic that increases the chance to apply effects like Ignite. Pushing that chance up (e.g., from 25% to 55%) makes your autos way more valuable, especially once you unlock Combust.
Levels 1–4: Building Your First Real Rotation
Level 1: Arcane Volley

You start with Arcane Volley. At level 1, your game plan is simple:
- Open with Arcane Volley at range.
- Let your wand or spellbook auto-finish the target.
- If an enemy closes in:
- Swap to scepter for cleaving autos and a bit of extra safety.
Arcane Volley is neutral, meaning it doesn’t alter your elemental empowerment, which matters later when you’re aiming for specific finishers.
Level 2: Lightning Strike

At level 2, you unlock Lightning Strike, and your gameplay immediately gets more interesting.
Lightning Strike:
- Can charge: the longer you hold, the more damage it deals.
- Should be your opener:
- Charge it at max range before your target can hit you.
- Synergizes perfectly with the elemental finisher reset:
- A lightning finisher from your autos will reset Lightning Strike’s cooldown.
How to use it early on:
- Pull with a fully charged Lightning Strike.
- After that opener, you usually don’t need to fully charge it again. Quick taps are enough, since your lightning finisher will keep resetting it during sustained combat.
Level 3: Frostbolt

At level 3, you grab Frostbolt, and that’s when classic mage kiting really starts.
A clean early rotation:
- Charged Lightning Strike at max range
- Frostbolt to slow the target
- Arcane Volley
- Autos (spellbook) until you get a Freeze finisher
- Quick Lightning Strike when it resets
- Swap to scepter if multiple enemies close in for cleaving autos and defense
From here on, always remember:
- You can move while casting. Strafe or walk backward while casting to maintain distance, especially vs. large hitboxes.
Level 4: Firebolt

Level 4 gives you Firebolt, and it’s a huge early-game power spike because it has three charges.
Your rotation now becomes:
- Lightning Strike (charged opener)
- Frostbolt to slow
- Auto-attacks until you trigger Freeze
- Dump all three Firebolts into the target
- Arcane Volley to finish or keep pressure
- Repeat with finishers feeding resets
Fire isn’t just about raw damage here; those burns will later feed directly into Combust for disgusting DoT bursts.
Level 5: Shattering Shards

At level 5, you pick up Shattering Shards, which enhances Frostbolt:
- Casting Frostbolt after a lightning spell (e.g., Lightning Strike) causes Shattering Shards to:
- Add extra hits
- Provide a mini cleave in tight packs
- Boost your single-target damage substantially
The trap here is overconfidence: that extra cleave damage can overpull groups in dense areas. Use it, but know your surroundings.
Level 6: Blink vs Shell
Level 6 is where your defensives start to branch.
Option 1: Blink (Recommended)
Blink is the go-to choice for most mages:

- Short teleport that gives you immediate spacing.
- Perfect for maintaining a safe distance during kiting.
Best practice combo:
- Cast Frostbolt to slow the enemy.
- Auto-attack to get Freeze (or at least keep them chilled).
- Blink right after Frostbolt or after the finisher to maximize the distance while they’re slowed.
This makes re-engaging much harder for mobs and lets you control fights instead of reacting to them.
Option 2: Shell (If you’re struggling)
If you’re taking a lot of hits or still learning positioning, Shell is a viable alternative:

- An 8-second shield.
- Great for forgiving mistakes when you’re face-tanking more than you should.
A common early path is:
- Take Blink at 6.
- If you feel too squishy at 8, briefly swap to Shell until you’re comfortable.
- Later, when you unlock more tools, you can re-slot based on comfort and content.
Level 7: Combust – Turning Burns into Big DoTs
Level 7 is where your fire kit comes together, thanks to Combust.
Combust:

- Takes existing burning damage on a target.
- Boosts the remaining burn by ~30%.
- Compresses that boosted damage into a 4-second DoT called Conflagrate.
The practical takeaway:
The more Firebolt hits and ignite procs you stack before you Combust, the nastier that four-second burn window becomes.
Rotation with Combust
A strong level 7 rotation looks like this:
- Lightning Strike (opener)
- Frostbolt (slow + Shattering Shards synergy)
- Autos to Freeze
- Dump all three Firebolts to stack burns
- Combust to convert and amplify the burn into Conflagrate
- Arcane Volley while everything ticks
- Use finisher resets to cycle Lightning/Frost again
Played correctly, many same-level mobs will be effectively dead by the time the Conflagrate finishes ticking.
Levels 8–9: Chain Lightning, Shatter, and a Huge Power Spike
Levels 8 and 9 are where your kit starts to feel like a real endgame rotation in miniature.
Level 8: Shell or Chain Lightning?
At 8, you’re often weighing early Chain Lightning vs. defensive Shell.

- Shell at 8:
- Safer if you’re soloing aggressive zones or still learning.
- Lets you survive mistakes while you internalize your rotation.

- Chain Lightning at 8:
- Feels decent, but it truly shines once you pair it with Shatter.
- If you take it early, you’re slightly ahead of the curve but not at full power yet.
Most players prefer:
- Shell at 8 for comfort
- Then Chain Lightning + Shatter at 9 for a real spike
Level 9: Shatter + Chain Lightning

At level 9, you add Shatter, which is where your lightning/ice combo goes nuclear.
Key interaction:
- When a target is Frozen (from your frost finisher):
- Casting Chain Lightning into that Frozen target procs Shatter.
- Shatter adds a huge chunk of bonus ice damage (example values: around 225% bonus in some builds).
Your high-impact rotation with Chain Lightning + Shatter:
- Charged Lightning Strike opener at max range
- Frostbolt to slow and set up Freeze
- Autos until you land a Freeze finisher
- Chain Lightning into the frozen target to trigger Shatter
- Frostbolt dump, Firebolts, then Combust
- Arcane Volley and repeat as needed
This combo frequently:
- Deletes same-level trash mobs in one sequence.
- Puts you in a position to comfortably take on one-star elites if your movement is clean.
Level 10: Filling Out Defenses
By level 10, most mages who took the aggressive route early will circle back and:
- Pick up Shell if they skipped it before.
- Start planning for:
- AoE and group-focused spells.
- Utility options that make them more valuable in dungeon groups and large events.
The single-target rotation you’re using here, though, stays extremely effective well into the teens. You’ll tweak it as new spells come online, but the core engine of Lightning/Frost/Fire interplay + finishers + Combust, remains the spine of your damage.
Full Sample Rotation vs. Beefy Targets
For tougher mobs and early elites, here’s a clean “put it all together” loop:
- Open with a fully charged Lightning Strike at maximum range.
- Frostbolt immediately slows.
- Auto-attack until you trigger Freeze.
- Chain Lightning into the frozen target to proc Shatter (if you have it).
- Dump all Firebolt charges.
- Combust to convert and amplify all your burns into a heavy Conflagrate DoT.
- Weave in Arcane Volley as you kite backward.
- Blink right after a Frostbolt/Freeze if the enemy starts to close.
- If they still reach you, swap to the scepter for cleaving autos and extra defensive value.
- Use dodge + stamina to avoid telegraphed big hits; you can often evade entire abilities just by walking or kiting out of their hitbox while casting.
Once you’re comfortable with this pattern, you’ll notice that most enemies either die before they really get going or spend the fight hopelessly chasing you.
Efficient Gathering While Leveling
Early mage leveling isn’t just about spell rotations. Ashes rewards players who multitask:
- During downtime (cooldowns, mana regen, or short rests):
- Gather nearby resources: rocks, trees, flowers, etc.
- Gathering:
- Gives character XP
- Level your gathering professions
- Feeds commission turn-ins for extra XP

Tips:

- Buy extra bags from town vendors as soon as you can. The more you carry, the less often you have to run back.
- Check the local gathering commission board and prioritize resources that match what you’re already picking up in your grinding zone.
You’re killing mobs anyway; you might as well turn that route into a mini economy.
Tackling Elites & Longer Fights
With good mechanics and the rotation above, you can absolutely solo:
- One-star elites
- Multi-target pulls around or slightly above your level
Key survival habits:
- Treat stamina like a second health bar.
- Use dodge on big, clearly telegraphed swings and casts.
If you overpull the target:
- Blink → mount → sprint away.
- That combo is one of the most reliable escape tools in this level range.
For big targets, go back to the “full sample rotation” above and think in loops:
Lightning → Frost → Finishers → Chain Lightning/Shatter → Firebolt dump → Combust → kite → repeat.
Consumables: What You Should Actually Carry
Consumables make a noticeable difference in how smooth your leveling feels.

Rations
- Sit to recover health.
- Eating a ration speeds up your resting recovery significantly.
- Try to carry ~40 rations in your bags.

Health Salves

- Highly recommended before Harbinger.
- Act as an emergency buffer when things go sideways.
Mana Salves

- Nice to have, but not mandatory if you:
- Take short rests between pulls.
- Don’t mind a slightly slower pace.
You can buy:
- Rations from main vendors in Lion’s Hold and Somaya’s Hope.
- Health and mana salves from the Flame & Formula vendor.
Currency Tip: Glint vs. Coin

- Mobs drop Glint (unsafe currency).
- Vendors convert Glint into safe coin.
- If you die, you drop Glint, not coin—so:
- Convert Glint often.
- Use that coin to restock rations and salves.
Early Gear: What’s Worth Chasing
Gear is relatively light in this bracket, but there are a few standouts.

- Near Lion’s Hold, there’s a basic quest:
- Collect six parcels along a road south of the gate.
- Rewards a choice of three pieces of green gear around level 5.
- Gear options:
- Light armor: more magic defense, more offensive stats.
- Riverstalker-style gear: more balanced between physical and magical defense.
Because a lot of early damage is physical, many solo mages prefer balanced pieces for comfort, then swap in more magic-oriented items as content ramps up.
Keep an eye out for:
- Main story quests that reward gear.
- Any new starter gear quests added in later patches and updates.
Quests, Commissions, and Good Grinding Spots
Questing Strategy
- Do main story quests that offer meaningful rewards (especially gear).
- Regular side quests are fine, but:
- Grinding dense clusters of mobs is often more XP-efficient than chasing scattered objectives.
- Use commission boards in town:
- Grab kill quests that match the mobs you were going to farm anyway.
- Stack gathering commissions with your route.
Strong Grinding Locations (1–10)
Levels 1–3:

- Goblins around the starting area and north of Emberhold.
- Goblins in the ruins drop Rubble; 10 rubble can be turned in for a repeatable quest.
Levels 4–6:

- Bandits around Nika Bray and Coral Lock.
- Great density and manageable packs for your early rotation.
Up to 10:
- Highwayman Hills scales up toward level 10.


- Warhelm ramp/bridge:
- Level 7 griffins and other elites, high risk but great rewards.
Be careful around tightly packed bandit groups and patrols; if a pull looks sketchy, blink out and mount + sprint to reset.
Early Skill Trees & Build Priorities
You won’t fully flesh out your trees at 10, but your early picks matter.
Spellbook
Prioritize the Burning/Ignite line:

- Boost ignite chance (e.g., 55% over 25%).
- Extend ignite duration where possible.
This makes your Firebolts far more valuable and supercharges Combust.
At around level 8 Spellbook, aim for:
- Refreshing Followthrough (or similar mana sustain node):
- Eases or eliminates mana starvation.
- Lets you chain more fights without sitting.

Scepter/Mace
You’re not living in melee, but a scepter/mace is your fallback when mobs get in your face, or you’re cleaving small packs.
Good early options:

- Stagger effects for clutch control.
- Cast-time adjustments for smoother defensive play.
- Nodes that grant:
- Penetration (better damage).
- Warding / temporary health from deadly finishers for extra survivability in multi-target pulls.
Stamina Tree

This tree quietly makes or breaks many mages.
- Springstep / Increased Dodge Distance (~+50%):
- Mandatory-feeling for kiting builds.
- Stamina refund on successful dodge:
- Lets you dodge more often in sustained fights.
- Increased evasion after dodge:
- Stacks well with your evasive identity.
- If you’re never blocking:
- Consider investing in sprint-related nodes so repositioning feels less punishing.
Looking Ahead: Aftershock, Longbow, and Future Burst
Later on, once you unlock a spell, longbow, and additional stagger/CC options, you can start layering:
- Aftershock with Chain Lightning + Shatter
- Double-casting Chain Lightning into frozen targets
- Multiplying your burst windows to delete even sturdier enemies
Final Thoughts
The early mage experience in Ashes of Creation is all about movement, finishers, and smart cooldown cycling. Once you:
- Nail the Lightning → Frost → Freeze → Chain Lightning/Shatter loop,
- Get comfortable dumping Firebolts into Combust windows,
- And build the habit of Blink + dodge + stamina management,
You’ll find yourself mowing through content that other classes have to grind through slowly.
Source link