If you’re having a hard time trying to find out how to screenshot on Windows, you aren’t alone. If you aren’t familiar with a keyboard, then it can be tricky trying to navigate the space. This guide will show you every method available to you for screenshotting on your PC. Follow along for detailed instructions and visuals.
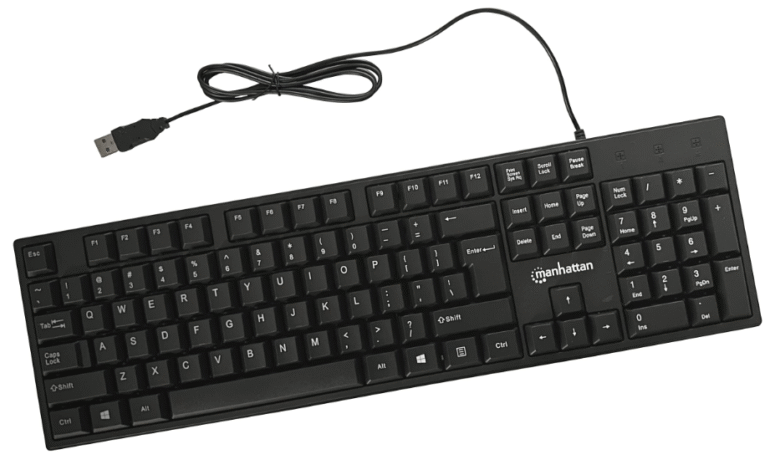
Print Screen
There is a button on your keyboard that is usually labeled “Prt Sc”. This is the print screen button. This allows you to take a screenshot of your window.

This screenshot gets copied to your clipboard. Meaning, you can now open applications like Word or Notepad and paste the image there.
Windows + Print Screen
If you press the Windows button on the keyboard and the Print Screen button at the same time, it will automatically save the image to your files.

To find the image, go to your pictures and look for the folder labeled “Screenshots.” You will see the picture you just took within the folder.
Alt + Print Screen
If you have more than one screen, this option is for you. By pressing the Alt button and the Print Screen button at the same time, it will screenshot ONLY the active window. Meaning, whatever window or screen you have last clicked on will be what gets screenshotted.

This will be copied to your clipboard. You can then paste it into whatever application you are using.

To use this method, on your keyboard, press the Windows key at the same time you press your Shift key and the letter S. This will open the Snip and Sketch tool on your computer window.

You can now use the options provided by the tool to choose how you want to take your screenshot. This option allows you to clip and snip, rather than taking unnecessarily large screenshots. You can quickly use the tool to screenshot the exact information you want on your screen.
The screenshot gets copied to your clipboard, where you get the option to edit the clipped image. You can crop, draw, add, etc. to the screenshot. There will now be an option on that page to save the image to a folder. If you don’t edit the image, it will be on your clipboard, where you can paste the image into the desired application.
Windows 11 gave an upgrade to the Snip and Sketch tool. However, they still function the same. It’s just the interface that looks a bit different.
To get to the Snipping tool, you can either type it into the computer’s search bar or use the same method of pressing Windows, Shift, and S simultaneously.

The tool does add some new features, like pre-set snipping tools and delayed capture. Once getting your screenshot, it can be saved and edited in the same way as Windows 10.
Game Bar
To open the Game Bar, on your keyboard, press your Windows key and the letter G at the same time.

You will see several different things pop up around your screen. But, in the top left, you will see a camera icon. Click this or press the Windows, Alt, and Print Screen keys at the same time, while the interface is up, to take a screenshot.

To see the saved images, click below the area where the camera icon is, where it says “See my captures.” This will open up the image. Or, you can go to your Folder and open up the Videos folder. It’s in here that you will find the screenshot.
Wrapping up
And that’s all there is to taking a screenshot on your PC. Whether you want to go the old-fashioned way of just hitting the Print Screen key or you want to open the Snipping tool and edit the photo quickly, these are all sure bets to obtain that image you want.
Happy clipping!
Source link