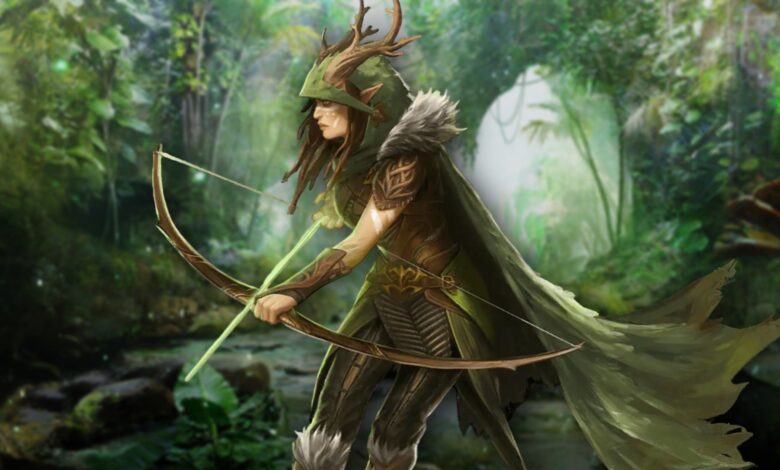
The Ranger is one of the 8 classes you can pick up in Ashes of Creation, and it can be a tough one for beginners.
Excelling at burst damage from range, the Ranger is mostly a DPS class with some utility. Their mobility and ranged attacks allow them to pelter enemies with arrows, but they’re quite squishy when put into melee range.
In this guide, we’ll tell you everything you need to know about the Ranger. It includes basics and the early game progression.
Ranger Gameplay Basics

As a Ranger, your weapon of choice will be bows, of course. Like other classes and weapons, bows have a standard combo sequence consisting of 5 attacks. The final hit of this sequence is a Finisher with a chance to become a Deadly Finisher.
We’ll talk more about the Deadly Finisher later on. For now, the main thing to remember is that this Deadly Finisher can apply specific effects to enemies. This will depend on your build, but the gist of it is that you want to get Finishers as often as possible.

That aside, your main resource as a Ranger is Focus, which is the green circular bar on the top left. You regenerate 3 Focus per second and landing a Finisher will restore 10 Focus on hit.
You can spend Focus to deal up to 15% additional damage with your abilities. So, making sure to store Focus by landing Finishers is a key way to boost your damage output as a Ranger.
As a Ranger, your overall game plan is to stay out of range to damage and weaken foes. You’re very mobile and can dish out great burst damage. Your debuffs also offer great utility against tougher foes.
The one downside is that you’re squishy and very frail in melee range. Positioning and timing are extremely important to master as this class!
Hunt and Mark

As a Ranger, you also have a Hunt and Mark Prey mechanic. There are multiple types of Hunts, which act as a sort of self-buff. On top of that, Hunts modify your Mark Prey ability to give different effects. You can only have 1 Hunt active at a time.

As for Mark Prey, this is an active ability that summons the spirit animal of your current Hunt. Once it hits an enemy, it will provide an effect based on which Hunt you have active.
For example, Hunt of the Raven will apply a Mark that reduces an enemy’s evasion by 25% for some time. Once the Mark expires, the enemy will lose their Evasion debuff and you’ll gain a 15% evasion buff instead.
Now, Mark Prey does have a decently long cooldown of 30 seconds currently. That said, you want to use it as often as possible to give yourself and your party the upper hand when fighting tougher foes!
Here’s a quick list of all of the Hunts and their Mark effects currently in the game:
- Bear – Reduces enemy’s mitigation by 25%. After expiring, increases your penetration by 10%
- Raven – Reduces enemy’s evasion by 25%. After expiring, increases your evasion by 15%.
- Tiger – Reduces enemy’s crit evasion by 25%. After expiring, increases your crit chance by 10%.
Recommended Early Game Progression
Level 1 to Level 5

Right from the get-go, your main ability is Salvo. On use, you’ll quickly fire off all your charged arrows to deal 50% physical damage. You get 1 charge when landing a combo Finisher and can store up to 6 by default.
So, in the early game your goal is to do regular combos to get 6 charges for Salvo, then fire a full 6-charge Salvo. Rinse and repeat for your basic rotation.

Once you hit Level 2, we recommend picking up Power Shot. This is a strong-but-slow charged shot that deals 200% physical damage. It doesn’t consume any Focus either, instead generating 25 Focus on hit. It’s a great battery ability.
As a bonus tip, Power Shot has a fairly lengthy recovery animation after firing. However, you can cancel the animation it by dodging! This allows you to reposition and follow up with Salvo quicker.

Once you hit Level 3, you’ll want to pick up Enhance Armament: Weight. Toggle it on to get a chance to Snare enemies with Finishers, Salvo, and Scatter Shot. This stops them from moving, making positioning easier.

At the same time, set your Deadly Finisher in the bow skill tree to Bleed. You’ll have a 25% chance to apply Bleeding to targets when you land your Deadly Finisher.
At this point, you’ll also get the Camouflage ability. This is mainly used to sneak close to enemies to start combat, or in the middle of combat to disengage. It’s nothing too amazing, but it’s nice to have.

Then, when you reach Level 4, you’ll want to pick up Scatter Shot. It’s an AoE attack that deals 125% physical damage to all enemies hit. Landing finishers reduces its cooldown by 3s, so you can use it pretty often!
If you want more single-target damage instead, you can get Concentrated Scatter Shot as well at Level 5.
Level 6 and Beyond

Once you reach Level 6, there are two things to do. The first is to get the Headshot ability, which deals 200% physical damage at a base. It deals an extra 25% to targets below 50%, while also applying Wounded to them.
Additionally, you’ll want to pick up Enhancement Armament: Barbs now, replacing the weight one from before. This will guarantee Bleeding on Finishers, Salvo, and Scatter Shot.
Since you have this now, you can also go back to the bow skill tree and swap from Deadly Finisher: Bleed to Deadly Finisher: Snare.

At Level 7, pick up Snipe. It deals a massive 400% physical damage to enemies and applies Shaken. When hitting a Bleeding enemy, it will also remove 1 stack of Bleeding and replace it with the stronger Hemorraging.

Once you hit Level 8, go for Barrage. As the name says, you shoot a barrage of arrows at an enemy, dealing 15% physical damage per arrow.
What makes this shine is that its cooldown is reduced by 0.1 seconds when hitting Bleeding enemies, and 0.2 seconds when hitting Hemorraging enemies. It synergises really well with this bleed-focused build!

For Level 9, go with Hasting Snipe. It gives you 20% more attack speed for 5 seconds after using Snipe. Since Snipe is meant as an opener, this works great at giving you the upper hand.

Lastly, at Level 10, grab Mortal Headshot. Your Headshots will now do 50% more damage against enemies that are at 50% or less health.
Level 10 Rotation

Now that you’re at Level 10, you should have a full rotation of abilities at your disposal.
First, you will want to start each fight with Snipe. Ideally, try to aim for being in the maximum range of it, which is 35m. This will give you the best positioning, as you don’t want to be too close to enemies.
After Snipe, follow this rotation: Power Shot → Dodge Cancel → Salvo → Barrage → Charged Scatter Shot → Standard Combo Attack → Power Shot, repeat the rotation.
Once the enemy is at 50% maximum health or less, you can start using Headshot for its extra damage. You just need to do the same rotation as before, but using Headshot whenever it’s off cooldown.
That should be your basic rotation for most encounters! The one note here is to remember to use your Hunts and Mark Prey whenever you’re going up against tougher enemies. Use Mark Prey shortly after Snipe and you’re set.
Other Levelling Tips

Aside from the main Ranger skill tree, we also recommend levelling up your Stamina skill tree as you go. Pick the middlemost upgrade every time, as it benefits your dodges the most.
Since dodges are your main way to stay out of harm’s way with this class, you want to go all in on them! It’s as simple as that.
That said, you might also want to consider packing a sword and shield as a backup loadout. You would use it only when enemies get into melee range, giving you some defensive options as you reposition.
Also, while this is universal for all classes in the early game, we recommend getting as many Rations as possible from early mobs. They are your best source for regenerating both Health and Mana.
So, there you have it! That’s our guide for beginners looking to pick up the Ranger class in Ashes of Creation. This covers all of the early game progression, so you should have a smooth time as you figure the class out.
Is the Ranger class not for you? Would you rather be sneaking around and stabbing enemies in their backs? Well, we have a guide for the Rogue class as well!
Source link